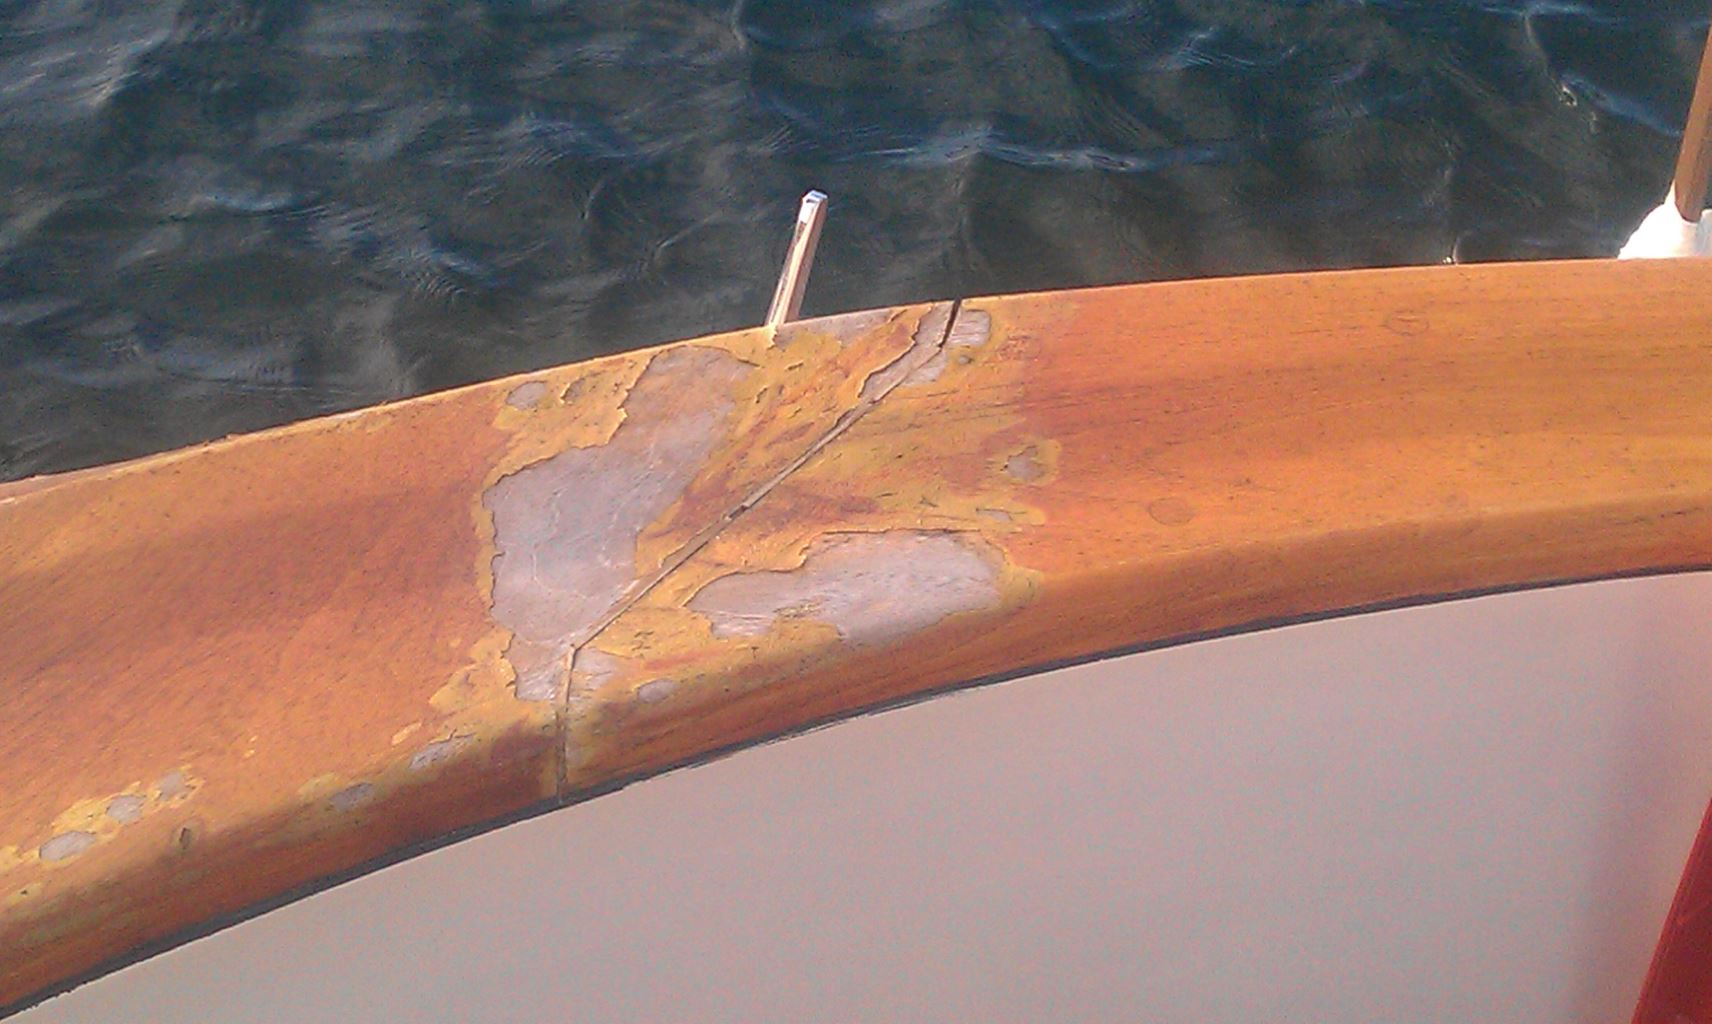
Shanti has a lot of teak on her exterior, and much of it is varnished. When we first purchased her, we knew all her brightwork would eventually need refinishing. The varnish on most surfaces was peeling, and you could see water intrusion (dark staining) in many places. There was so much wood, however, we didn’t know where to start or how we would get it all done. From bow to stern we had the toe rail and gunwale, the forward hatch and butterfly hatch, the coaming rail and coaming boxes, companionway doors, sliding companionway cover, steering wheel, and compass base. We decided we needed help with this project.
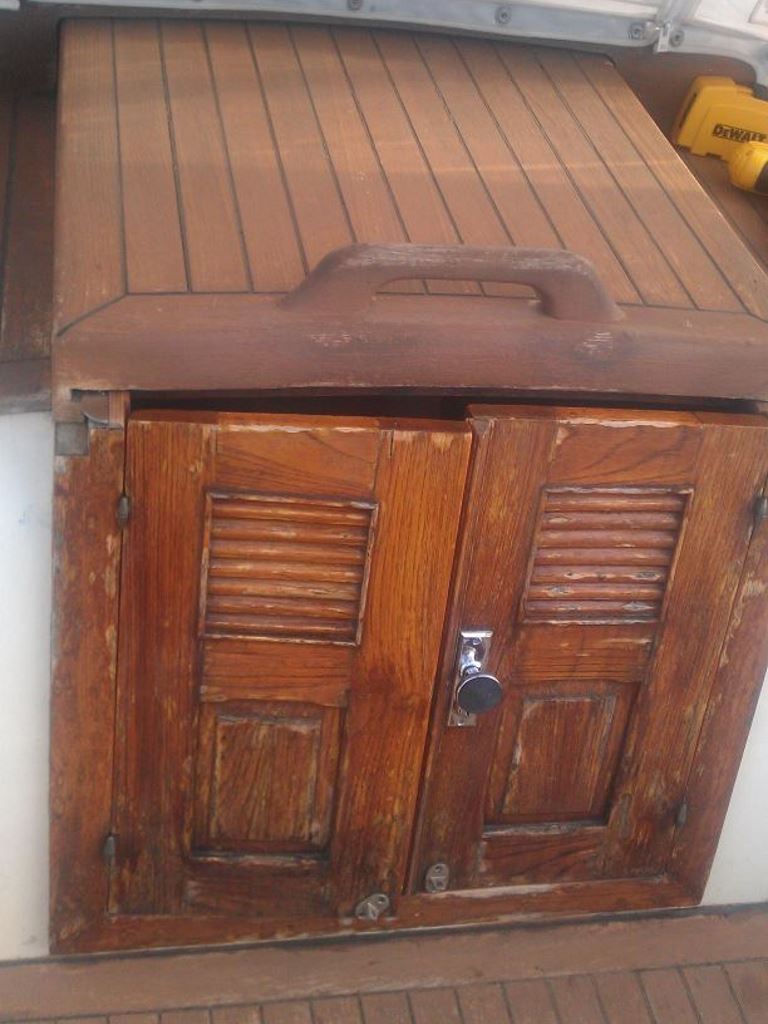
Here’s just a few “before” pics of our brightwork:


And a video of our gunwale where you can really see the deterioration:
The start
Before we looked for a contractor, we wanted to understand our options for finishes. The number of products available is staggering, and most require significant yearly maintenance. Some even require a complete refinish every year or two. Because of Shanti’s location ( Bayfield, WI), we knew the availability of contractors would be slim, and that anyone we found would probably use one of these products. We didn’t like how much work these would require on our part every year, but we resolved ourselves to the fact that we didn’t have much choice. We were going to be doing a lot of work every year. Not good, but what could we do? It was the price we had to pay for a boat with this much brightwork. We still decided, however, to have someone do the initial refinish, and we would do the yearly maintenance.
As we initially thought, we had limited options for contractors. We found 3 companies that did brightwork refinishing. One was a little outside our price range. Another asked if we could move the boat to their indoor facility, which would have added cost. The final company was Classic Hardwood Floors in Washburn, WI (who, despite the name, also refinished brightwork). Their quote was reasonable and they would do much of the work right at our marina, but they used a product we had never heard of: Honey Teak by Signature Finish. We did some research and discovered that it was quite a good product. It had even been written about in Practical Sailor magazine. It was a blend of acrylic, polyurethane, and enamel; looked just like traditional varnish; and was supposed to last several years without a re-coat. We decided to contract with them.
The work
It was late in the season by the time work started, and Kim (the owner of Classic Hardwood Floors) asked if we could store the boat at Washburn Marina for that winter, as it would make it easier for her to work on. We agreed, and that was the first season we hauled at Washburn. She removed the doors, steering wheel, compass base, and hatches for finishing in her shop. While they were off the boat, we replaced the acrylic “glass” in both hatches as well. The work would continue that fall and the following spring in the boatyard, and would finish the following summer when back at Roys Point. Kim, Holly, and Faith did all the work, and it turned out amazing. What a difference!
Since then, we have learned how to do this ourselves, and have since refinished our flag pole, our rail-mounted blocks for the dinghy outboard, and our windlass block. We also intend to finish the other half of our sliding hatch and both boom travelers. We’ve also learned how to repair scuffs and scratches. Signature Finish (Honey Teak) is remarkably easy to work with, and we love the longevity. We are now on our third year with no signs of peeling or failing from the original work.
Final thoughts
Another boat in our marina (a Baba 40) also had a ton of teak, and we found out they had used the same product on their brightwork. They went 7 or 8 years before seeing any signs of needing attention, and then only in select areas. We have also talked to a couple of other people that have had the same experience on their boats, as well. We have no affiliation with the Signature Finish company, but we would highly recommend their product to anyone, solely based on our own experience and what we’ve seen on other boats that used their product. For more information, visit their website: Fabula, Inc.
Before and after brightwork pics

Coaming before

Coaming after
Expansion joint before
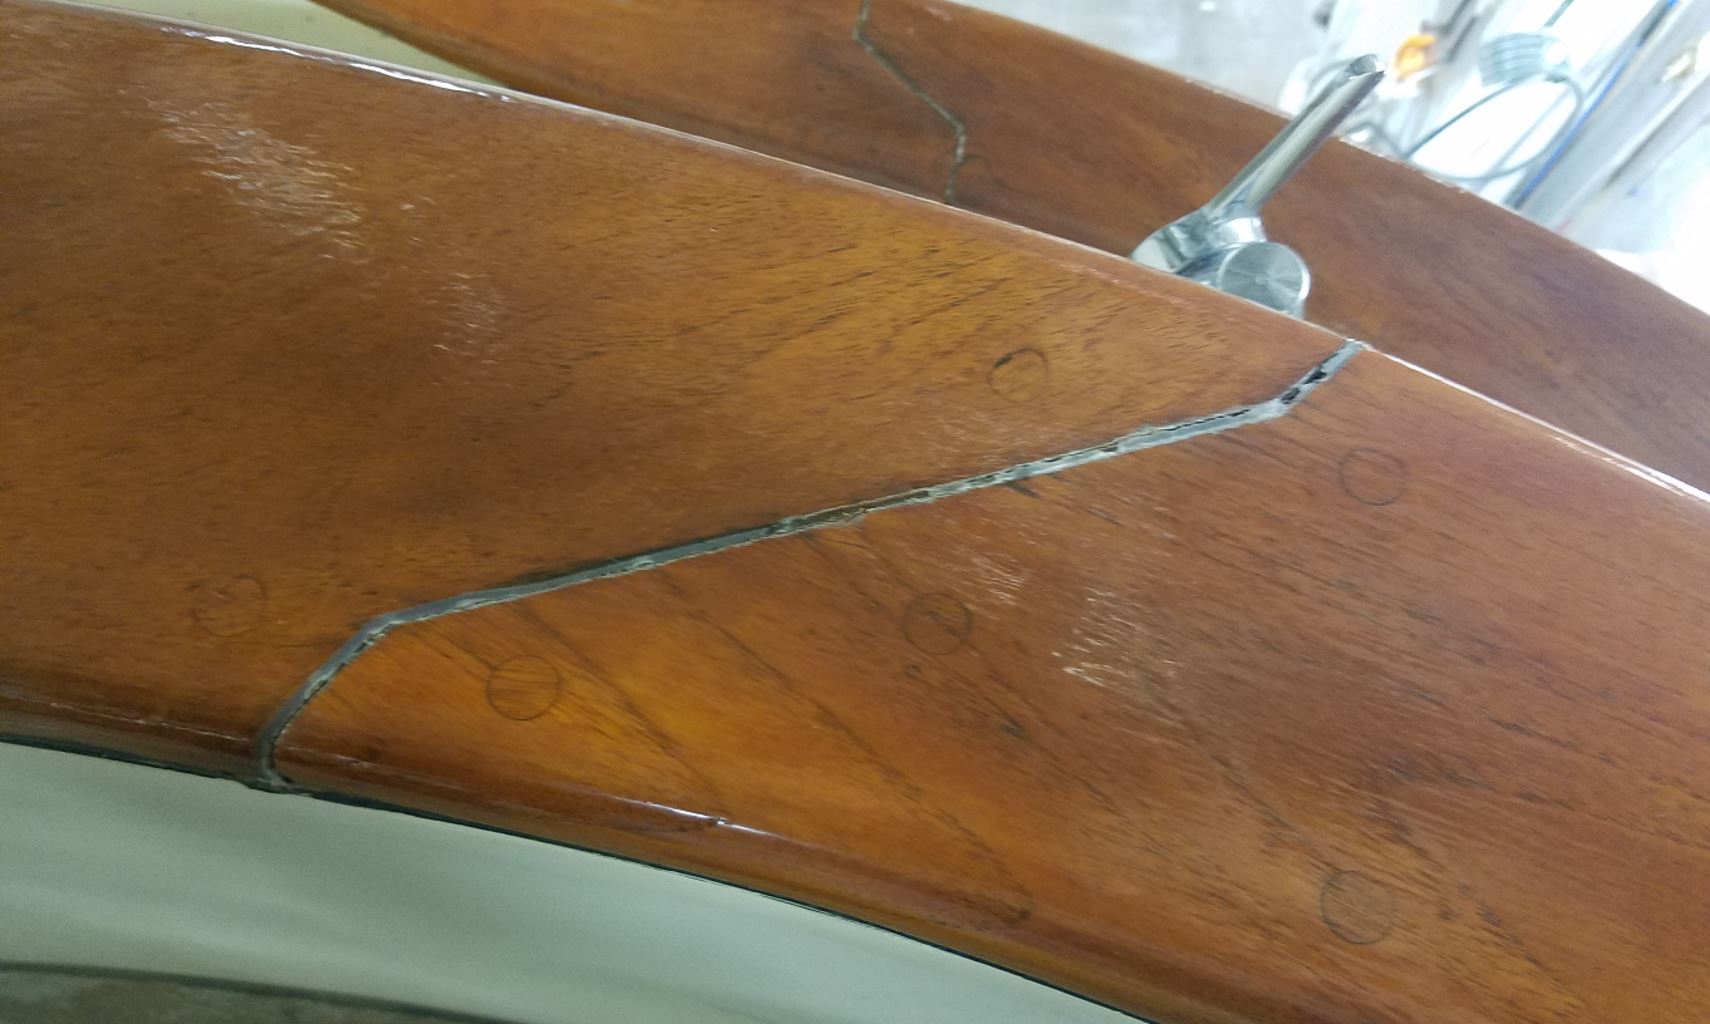
Expansion joint after
Companionway door before
Companionway door after
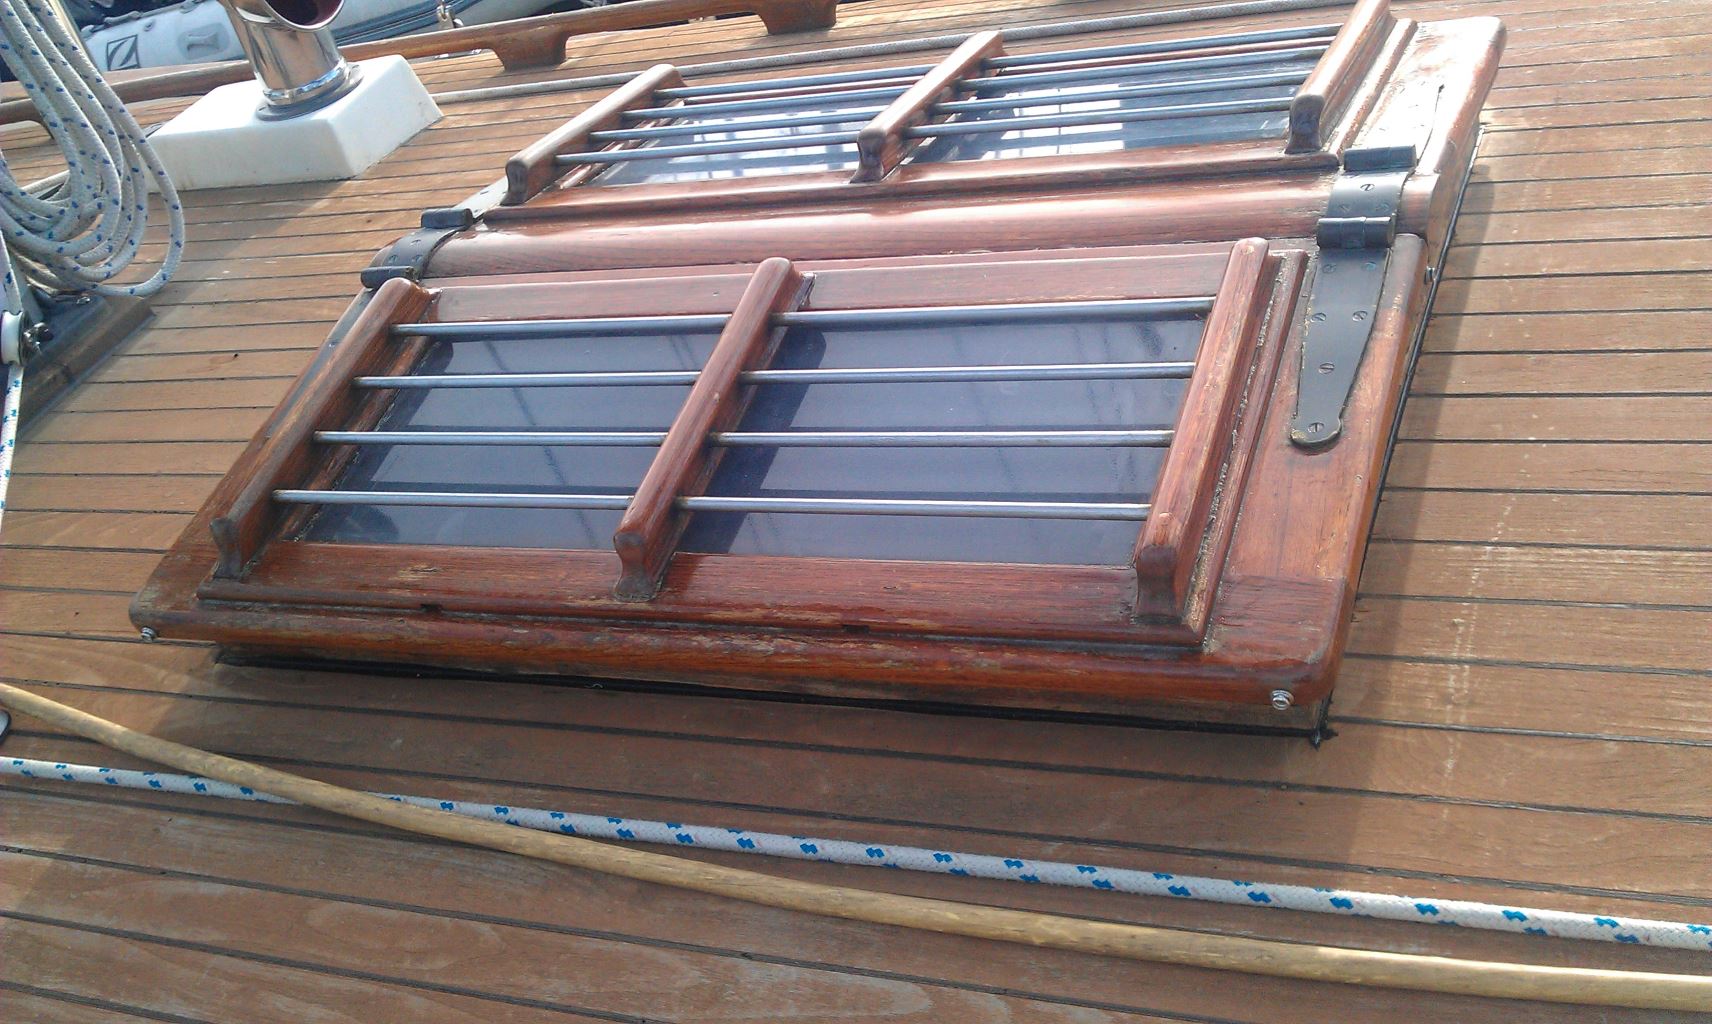
Butterfly hatch before
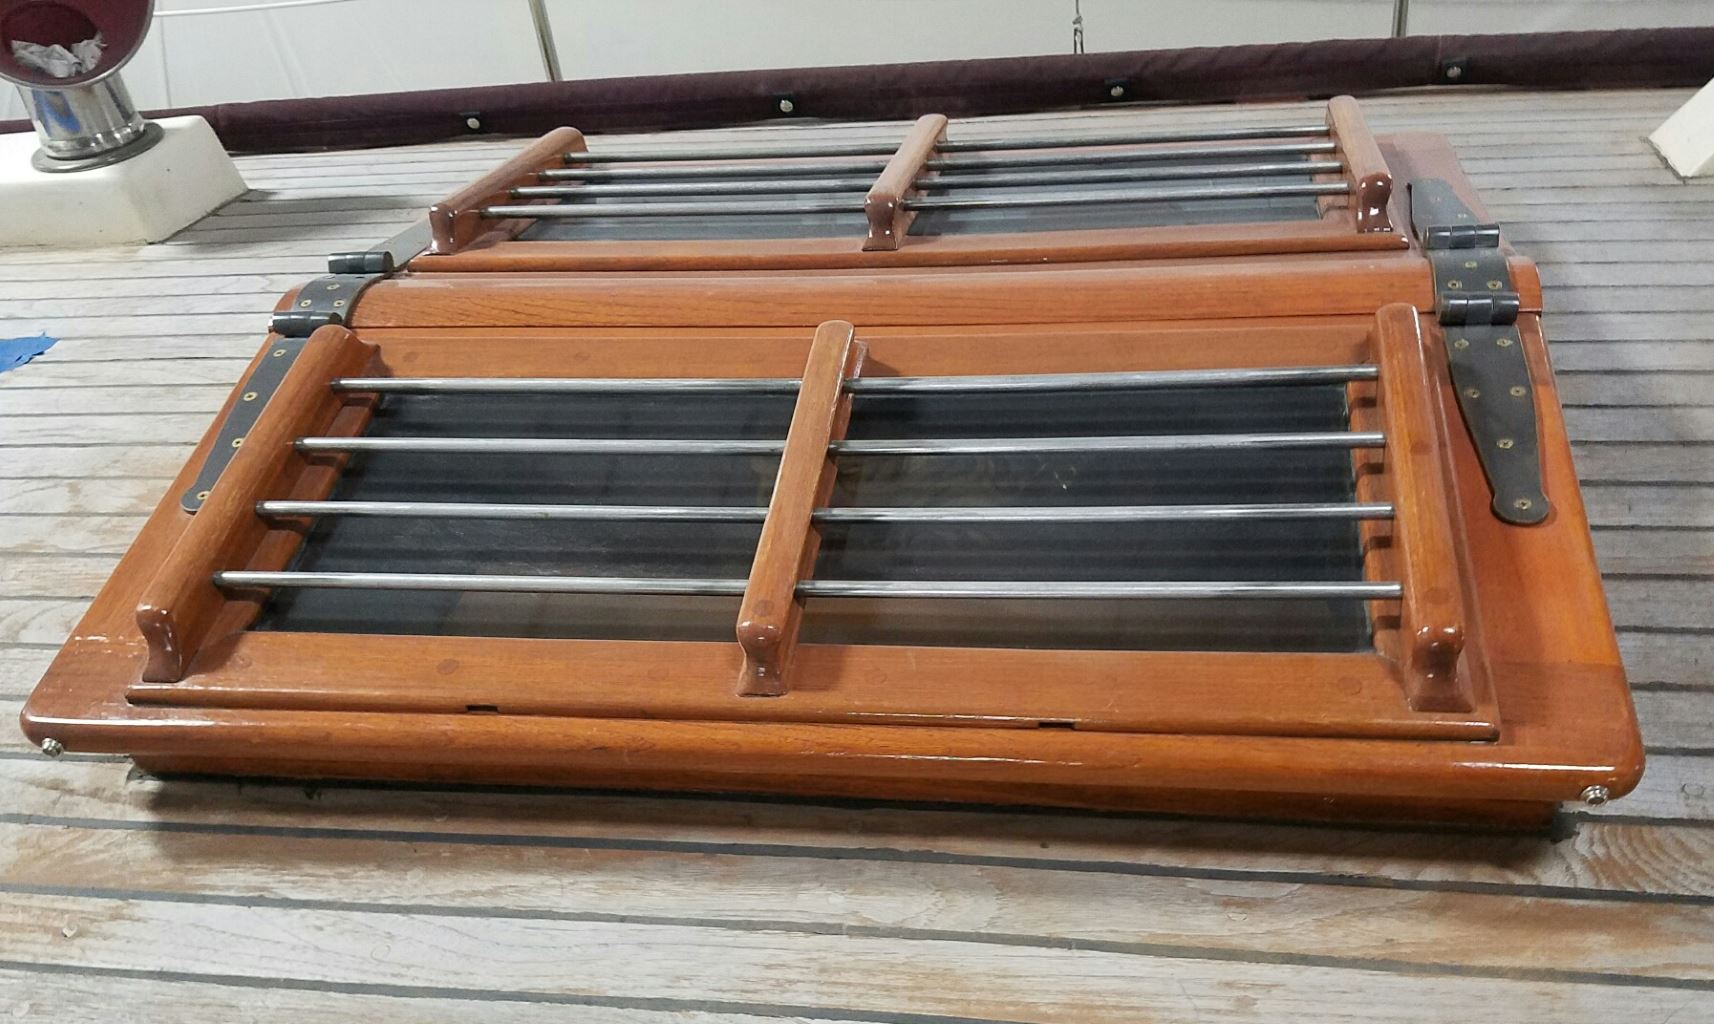
Butterfly hatch, after
Here’s an excellent pic that Kate took that really shows off Shanti’s cockpit and all the finished brightwork:
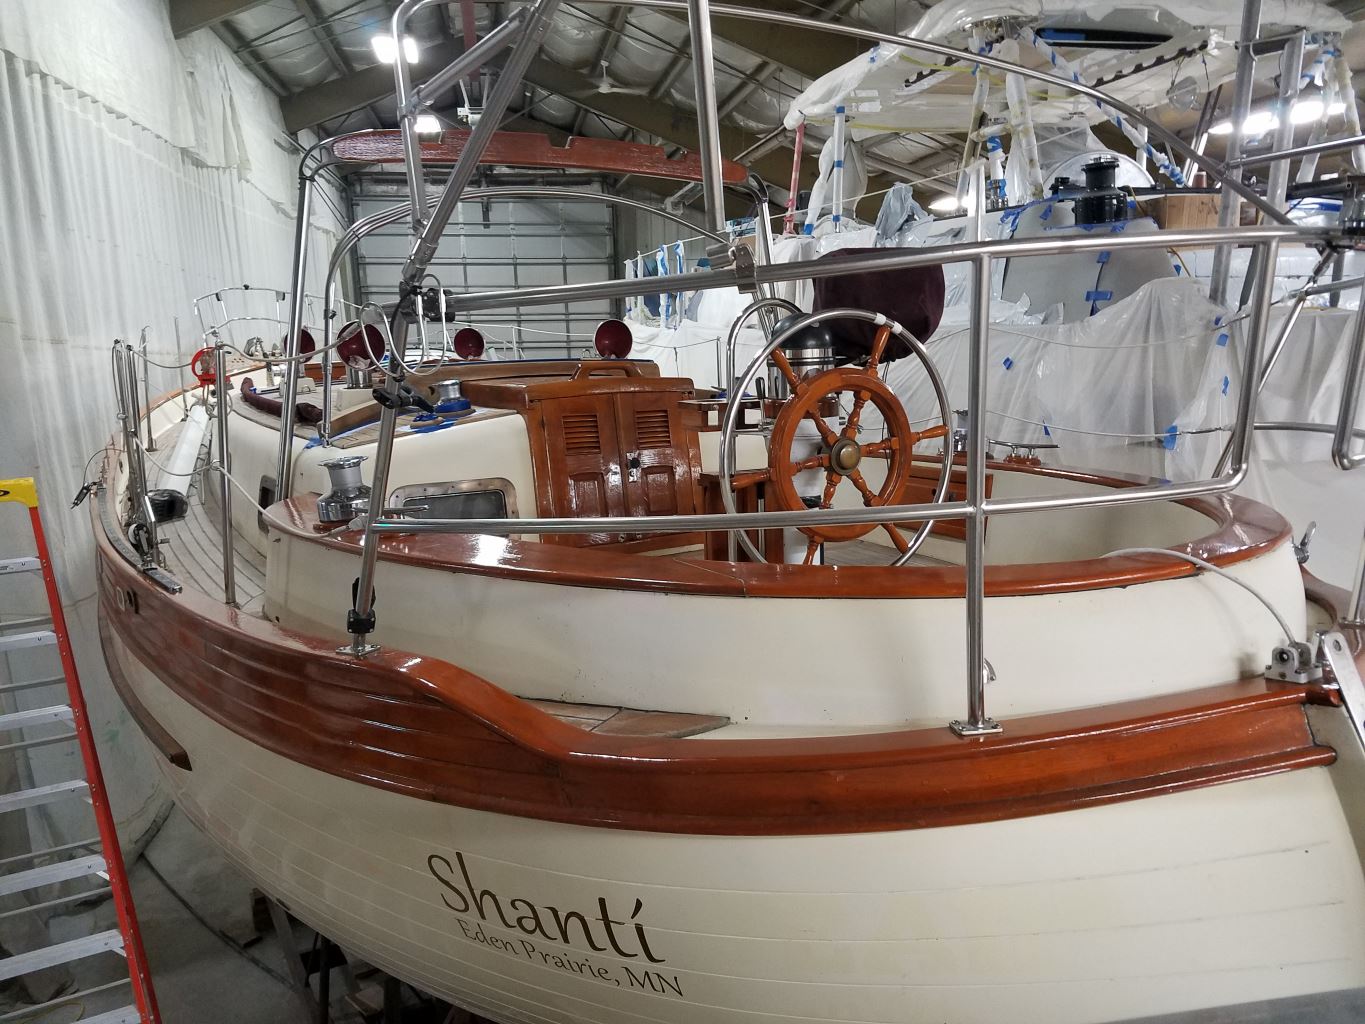
Cockpit brightwork
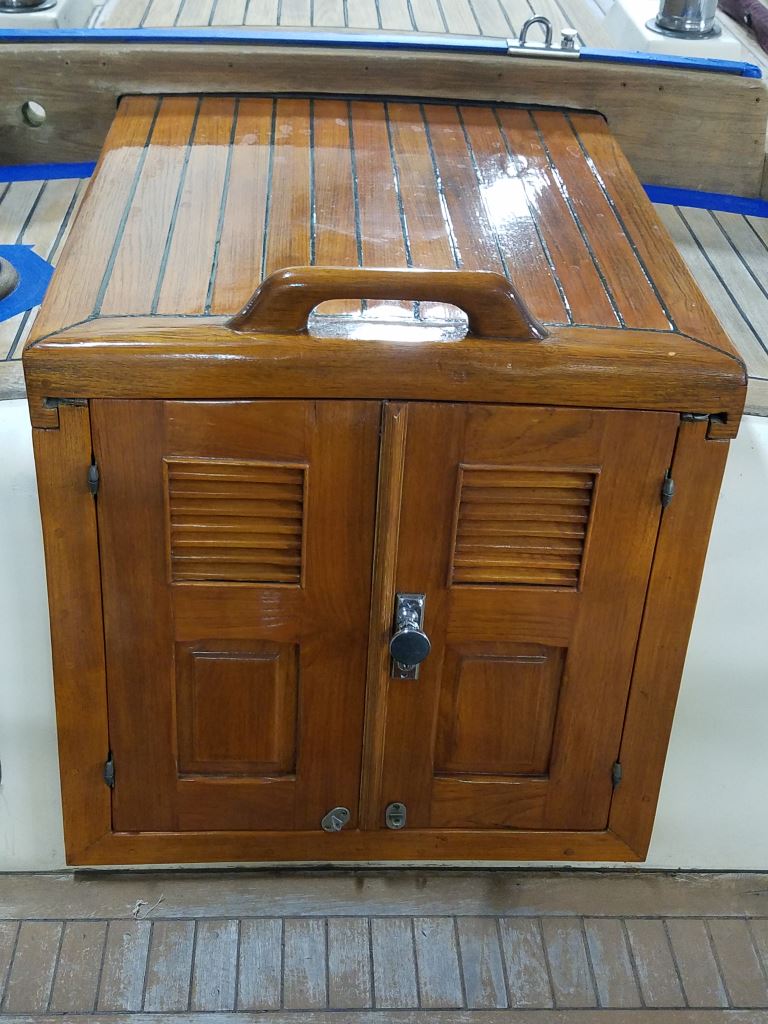
And some more pics of our own brightwork refinishing projects


Wow, I don’t feel quite so bad about the project ahead of me now on our Bayfield. I was curious how many coats or steps the process was.
Thanks,
Bill
We applied 2 coats of color, waiting only until the first coat got tacky before applying the second (about 1/2 hour to an hour or so). After the second coat, let dry for 24 hours. Then scratch the surface with a red 3M scratch pad. Then 4 coats of clear, dried to tacky between coats (1/2 hour to an hour). Then let those coats dry for 24 hours. Scratch surface again. Then 2 more coats of clear, dried to tacky between coats. Done!
A LOT of work, but the results are worth it. Plus, it lasted us about 6 years before we had to start doing touch-up work in some areas.