In addition to the deck, brightwork, fuel tank, and electronics, our list of other projects kept growing. At times, it seemed to be never-ending. Here’s a sampling of just some of the ones we’ve done over the years.
Windlass
Grand Deer made all of the fittings for Shanti, including the windlass. It operated manually, and the gypsy only accepted 3/8″ BBB chain. When we purchased Shanti, her main anchor was a CQR clone attached to 3/8″ chain that fit the gypsy. Our first purchase was a SPADE S100 44lb. anchor with 5/16″ G4 chain (the best purchase we have ever made for Shanti). The new chain would not fit the gypsy, which rendered the windlass useless. Grand Deer had been out of business for years, which made finding parts impossible. Short of milling a new one, we just couldn’t find a compatible gypsy. Since we couldn’t use the windlass, we raised and lowered that anchor by hand for 3 years. After Pat’s back and shoulders had had enough, we put in a new Lofrans Cayman electric windlass. Needless to say, at our age, a powered windlass is awesome!
Windlass pics

Old manual windlass
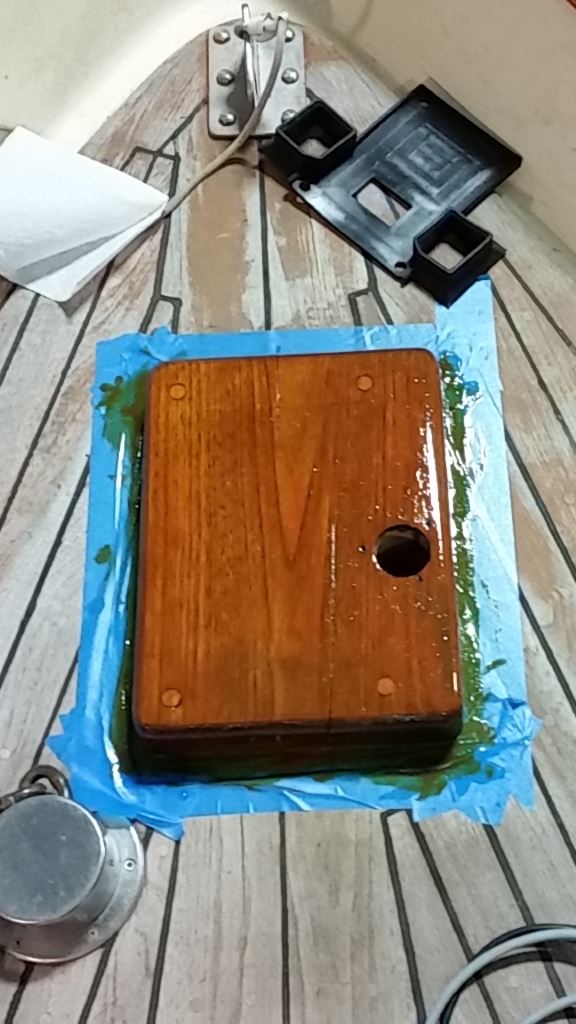
Windlass block, refinished
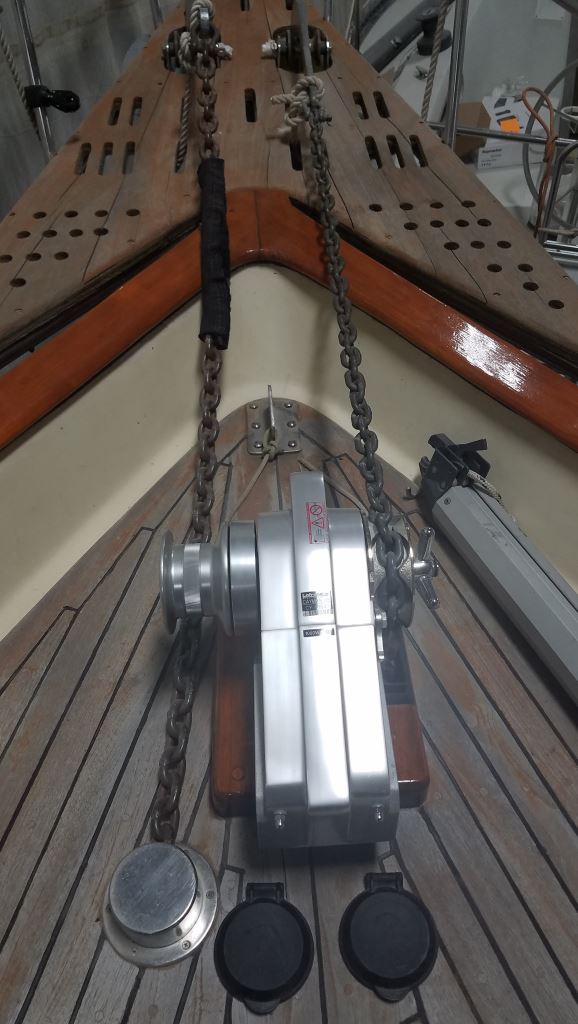
New windlass!
Holding Tank
OK, this is kind of gross. We had a funky smell on Shanti, but for a long time couldn’t find the source. It had a wet, rotten wood smell, and for a while we thought it was just an extreme case of “bilge smell”. One day, while looking under the V-berth (and under just the right lighting), we discovered the problem: our holding tank was leaking! We could see a tiny trickle coming down the side of the hull (yuck!). We opened the tank (again, yuck!), and found a crack towards the top of the tank. When it filled to that level (or on a heel), it would leak down the side of the hull and into the bilge. Side note: we think at some point Shanti ran into a dock (or something), causing the hull to flex and the tank to crack.
It was a fiberglass tank in the bow of the boat, so it was extremely odd shaped. We searched for a suitable replacement, but would have to have one custom made (expensive). Washburn Marina said they could repair it for less than a new one, so we opted for that! They removed the tank, re-glassed it, and re-coated the interior with epoxy resin. After it was re-installed and the new hoses connected, it was good as new. Two problems solved: no more leaking tank, and not more funky smell! Yay!
Head and hoses
The head was a Groco EB, built back when things were made to last (and it did!). But it was in desperate need of a rebuild, and it was mounted on a platform – too high off the floor to “do your thing”. Our hoses were also old and smelly, so we wanted those replaced, too. Our options for the head were to rebuild it (kits are still available) or purchase new. Rebuild kits were about $200, while a new head was $400. Since our hoses also needed replacing, we opted for a new head, too. We replaced it with a Raritan PH II and low odor hose (Raritan Sani/Flex). It’s still manual, but uses less water than the Groco, which is good for tank usage. It’s also a little lower, so Pat can now sit in comfort and not whine about how high the toilet is.
Refrigeration
Shanti had refrigeration when we bought her, which worked great until the end of our second year. It would start, run for 10 seconds, then quit. Lather, rinse, repeat. We isolated the problem to the control module, but (of course) couldn’t find a replacement. So, we replaced everything: evaporator, compressor, control module, and lines. We chose FrigoBoat, as their systems advertised one the lowest power consumption on the market. We decided a fan-cooled compressor would work best, as upgrading to water or keel-cooled on Shanti would have been difficult and costly. The new unit runs, on average, about 50% of the time, which equates to about 2.5 amps per hour. Our ice box is 9 cu. ft. (rather large), so we think that’s completely acceptable!
Bilge Pump(s)
When we bought Shanti, her bilge pump didn’t work. It was a diaphragm pump (no beef with that), and as luck would have it, our neighbor in the next slip replaced his diaphragm water pump with a Shurflo, and was kind enough to give us his old one. We were back up and running. Except that it was manually operated. Switch on when needed and off when the bilge was empty. Since it wasn’t automatic, we never felt comfortable with it, especially when we were away. Ultimately, we replaced it with a Johnson 500gph cartridge pump wired to a Johnson Ultima bilge switch. We put it on it’s own on/off/momentary breaker, too, so we can start it manually, if needed. We are also installing a secondary, high volume pump a little higher in the bilge, just for added safety (also on an Ultima switch and it’s own circuit breaker).
Cushions
Shanti’s cushions were worn, stained, and and needed replacing. Through Jim at Roys Point Marina, we found Tom Arms, owner of Arms Furniture Restoration Studio . Not only does he do household furniture, but he also does great work with boat cushions. At the end of our first season we gave him all of our cushions, and had a new set made for our second season. The difference is amazing.
Cushion pics, before and after
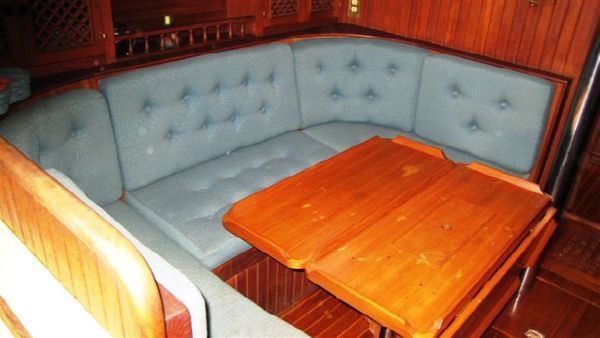
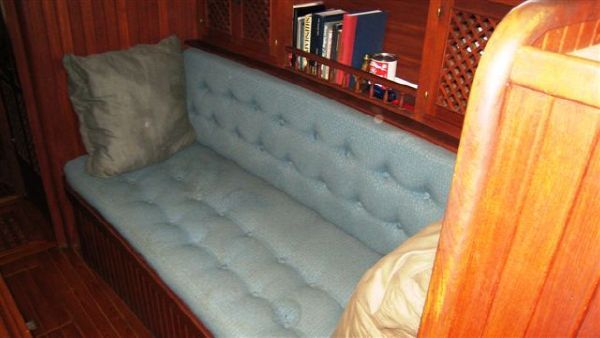
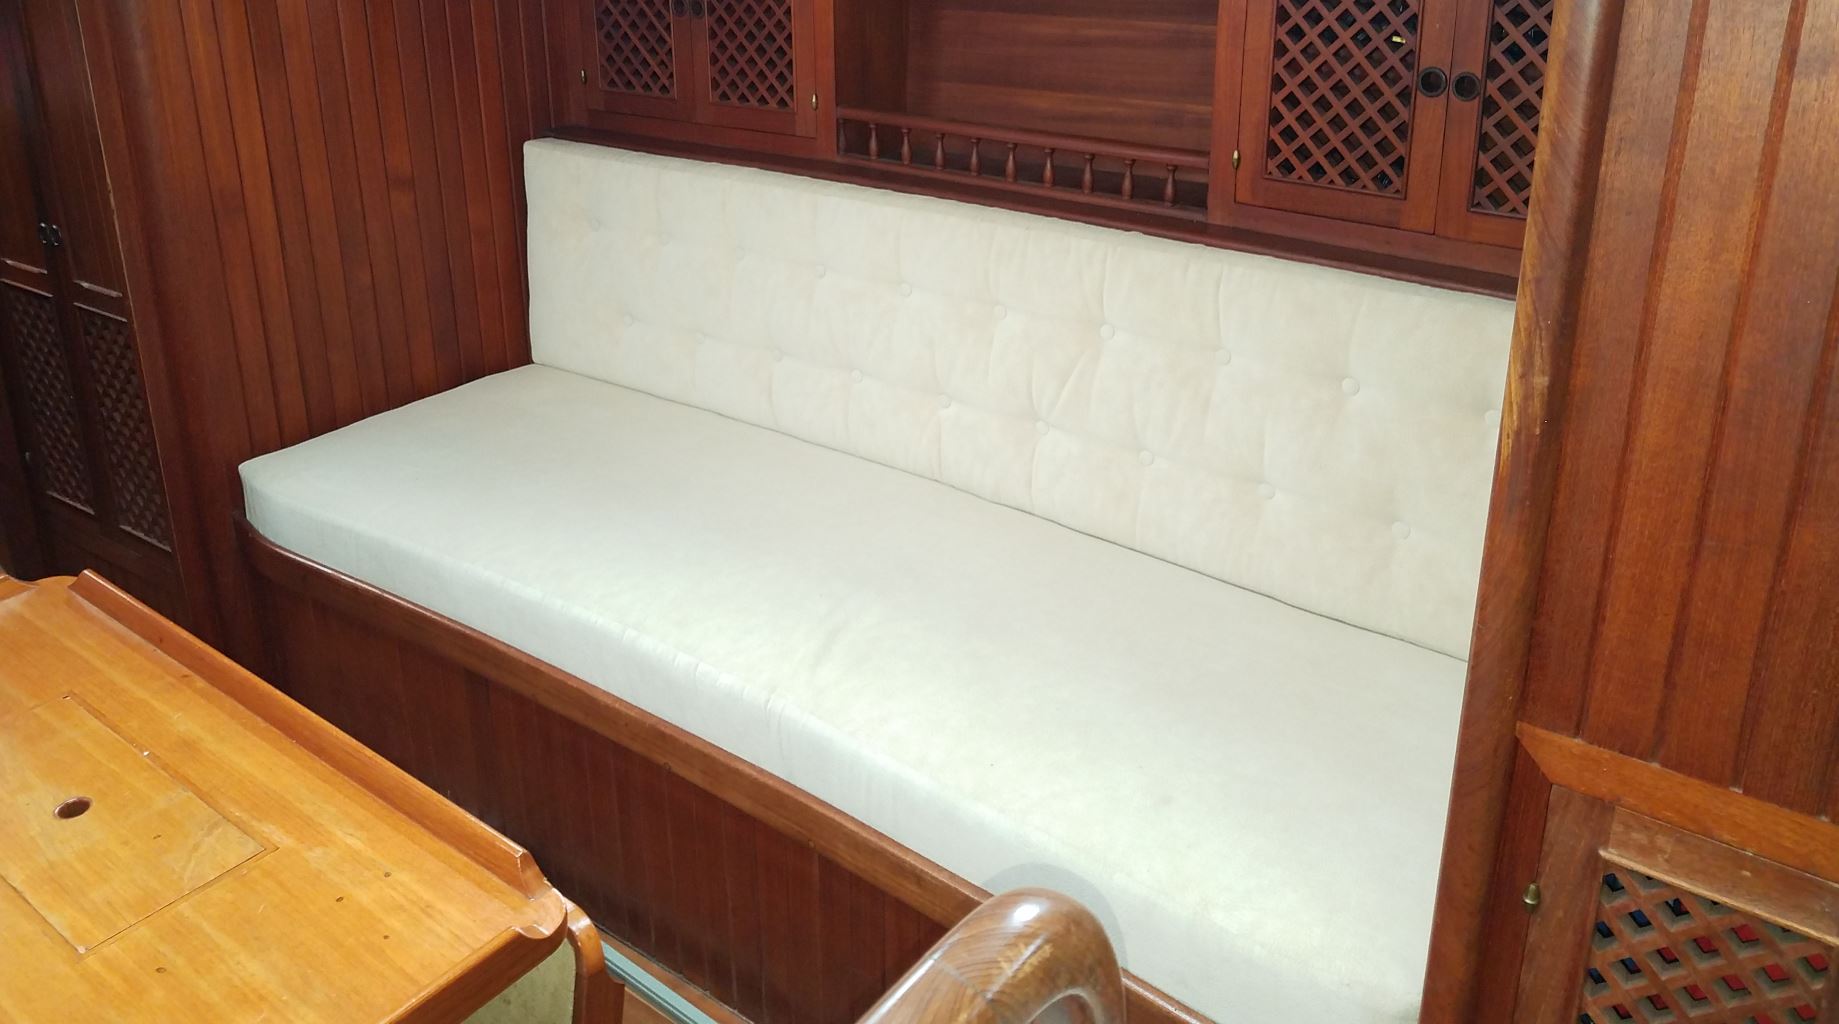
Port settee, before
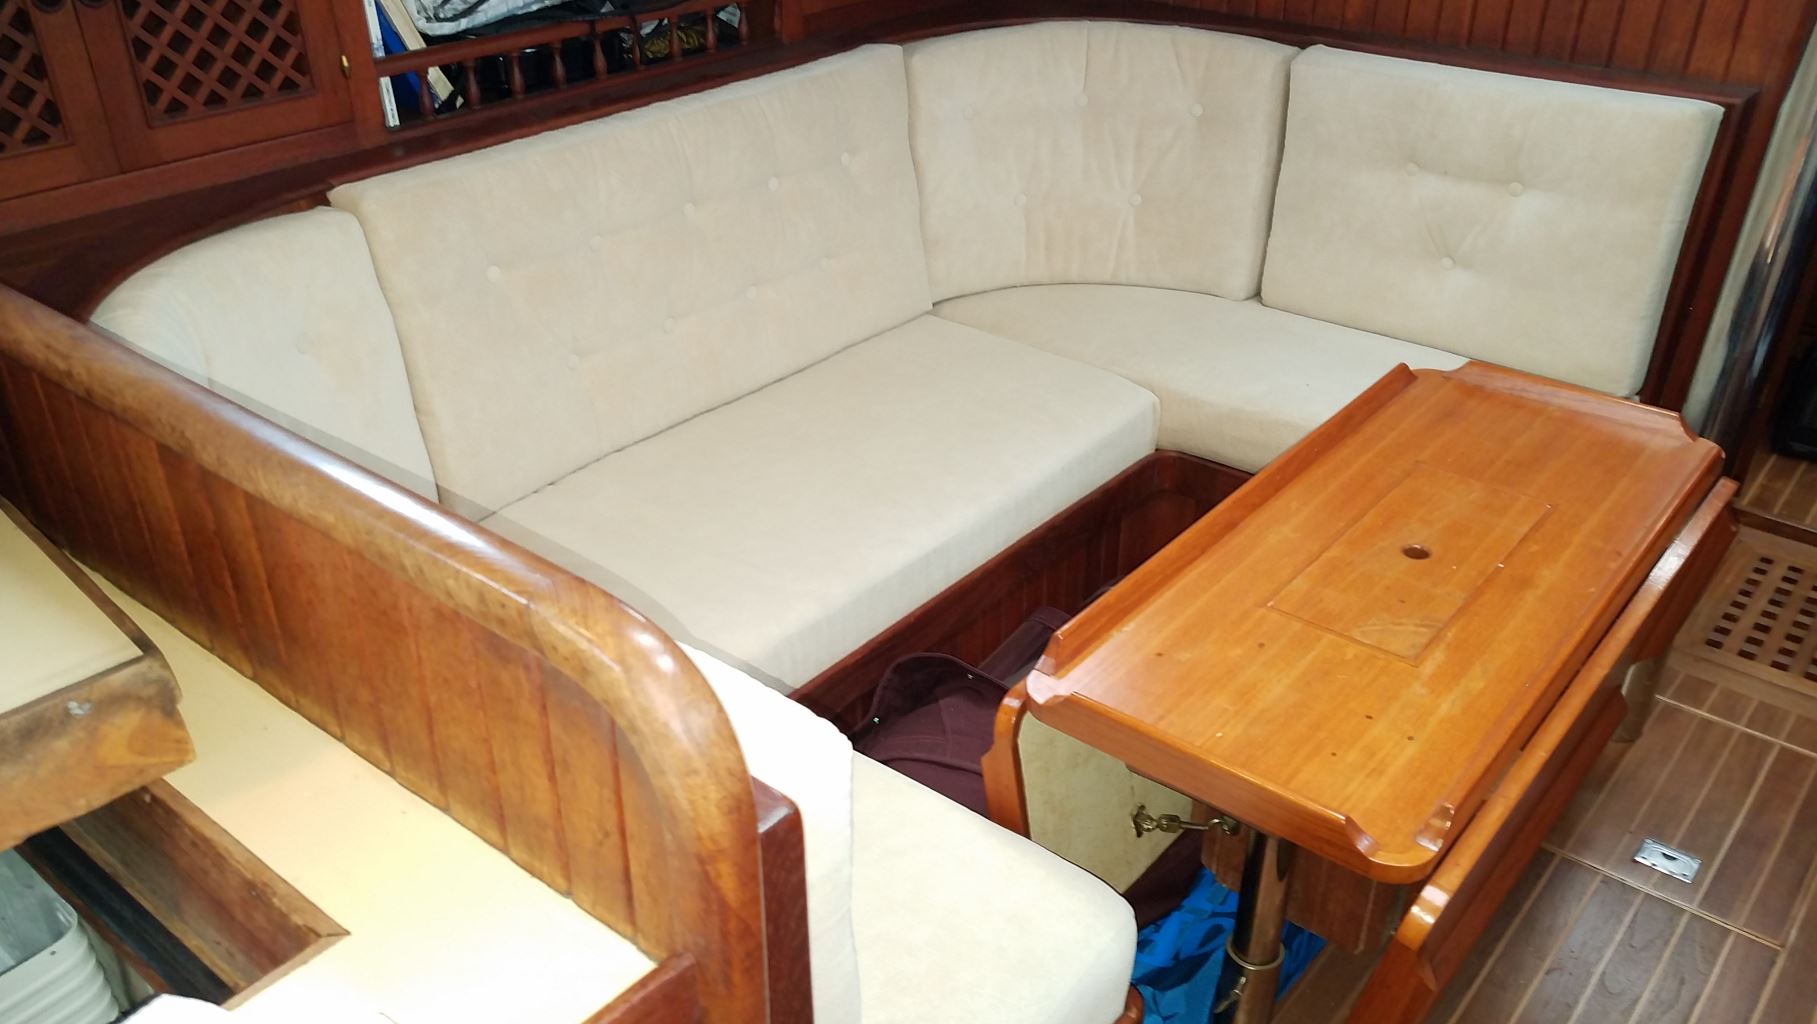
Port settee, after
Starboard settee, before
Starboard settee, after
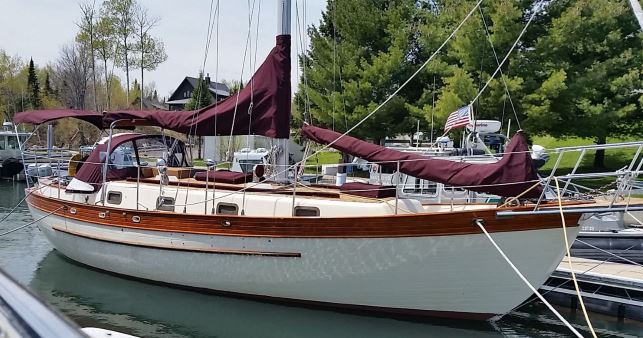
Sails and Canvas
While the sails were still serviceable, you could see they wouldn’t last much longer. The sail covers and dodger were getting thread-bare (our dodger tore apart during our third year). And, as you can see, the covers were blue and the dodger was off-white. In Bayfield, there were only 2 sailmakers, and of them only one did canvas work: Tim Olson at Tim’s Sail Loft. We contracted with him for a new set of sails and a complete set of canvas. He does excellent work, but being the only canvas guy in Bayfield, has a 2 or 3 year backlog. It was a long wait to get everything done, but now that it is, it looks great!
Canvas
We started with canvas. He first made us a new set of covers for the main and stays’l, a new dodger (and bimini!), and new hatch covers. Since we had the grab rails re-varnished, he made us a set of covers for those, too. And, he made an extension to connect the dodger to the bimini, so we can stay dry in the cockpit on those rainy or misty days. Add to that a new wheel cover that covers the whole pedestal (to also protect our table), and a new chartplotter bag, and our canvas was complete.

Canvas before
Canvas after
Sails
Next was our sails. For the main, we opted for a 2 + 2 configuration (2 full battens at the top and 2 partials on the bottom), with 2 reefing points. Arguments abound about fully vs. partially battened mainsails, but we eventually settled on the 2 + 2. The main advantages of full battens (or 2 + 2) are better performance and longer sail life. The stays’l remained the same size and shape, but we added a second reefing point, for the event it got real nasty. And we decided to go from a 90% jib to a 130%, for the lighter air (and were able to get a UV cover that matches our canvas)!
LED Lighting
We also replaced all of our lighting with LED bulbs. They utilize only 10% of the energy of standard bulbs, and with refrigeration and electronics, every little bit helps. Today you can buy LED bulbs to replace just about any type of standard incandescent. We were able to find bayonet bulbs for all of our interior lights, and also replaced the reading lamps in the V-Berth. We had 2 fluorescent lamps under 2 of the counters, which we also replaced with LED light strips. Next we replaced the red & green bow lights and the white stern light (and re-varnished the wood bases while we were at it). While the mast was down, we replaced the steaming light and the masthead (anchor) light.
Important note!
We learned the hard way that LED bulbs are polarity sensitive. If you put the bulbs in backwards, upside-down, or turned 180 degrees, they won’t light up. We went an entire season with our steaming light out after we put the bulb in upside down. We replaced the mast bulbs after we unstepped the mast, saw the error after the mast was put back up, and didn’t have climbing gear to correct the problem. At the time, it wasn’t an issue, as we didn’t motor at night, but we learned a valuable lesson! (And we got lucky with the anchor light, because that WOULD have been a problem)!
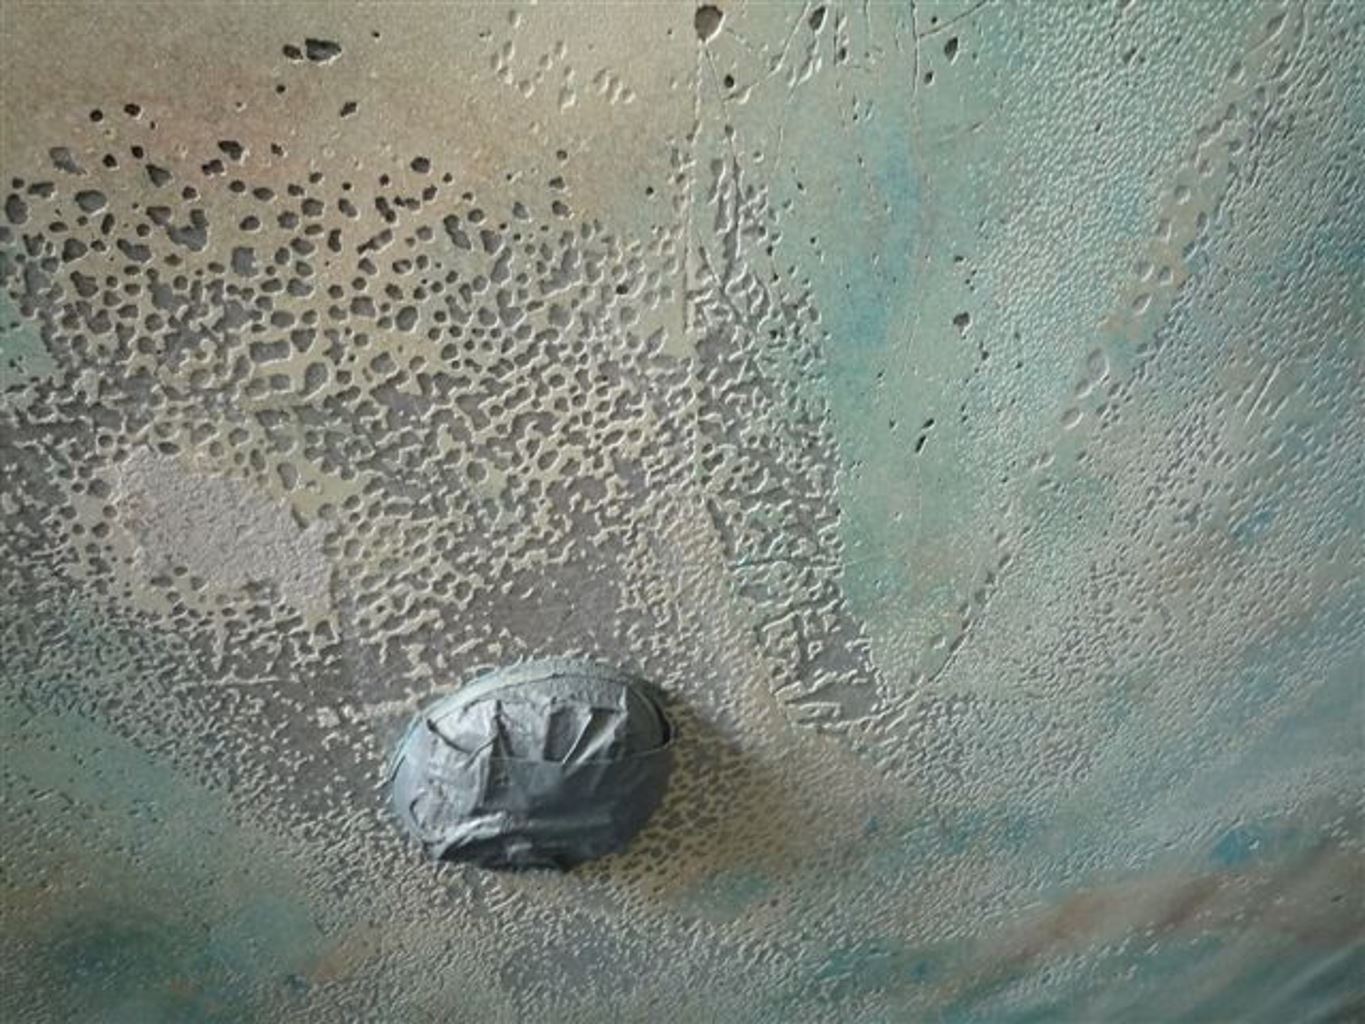
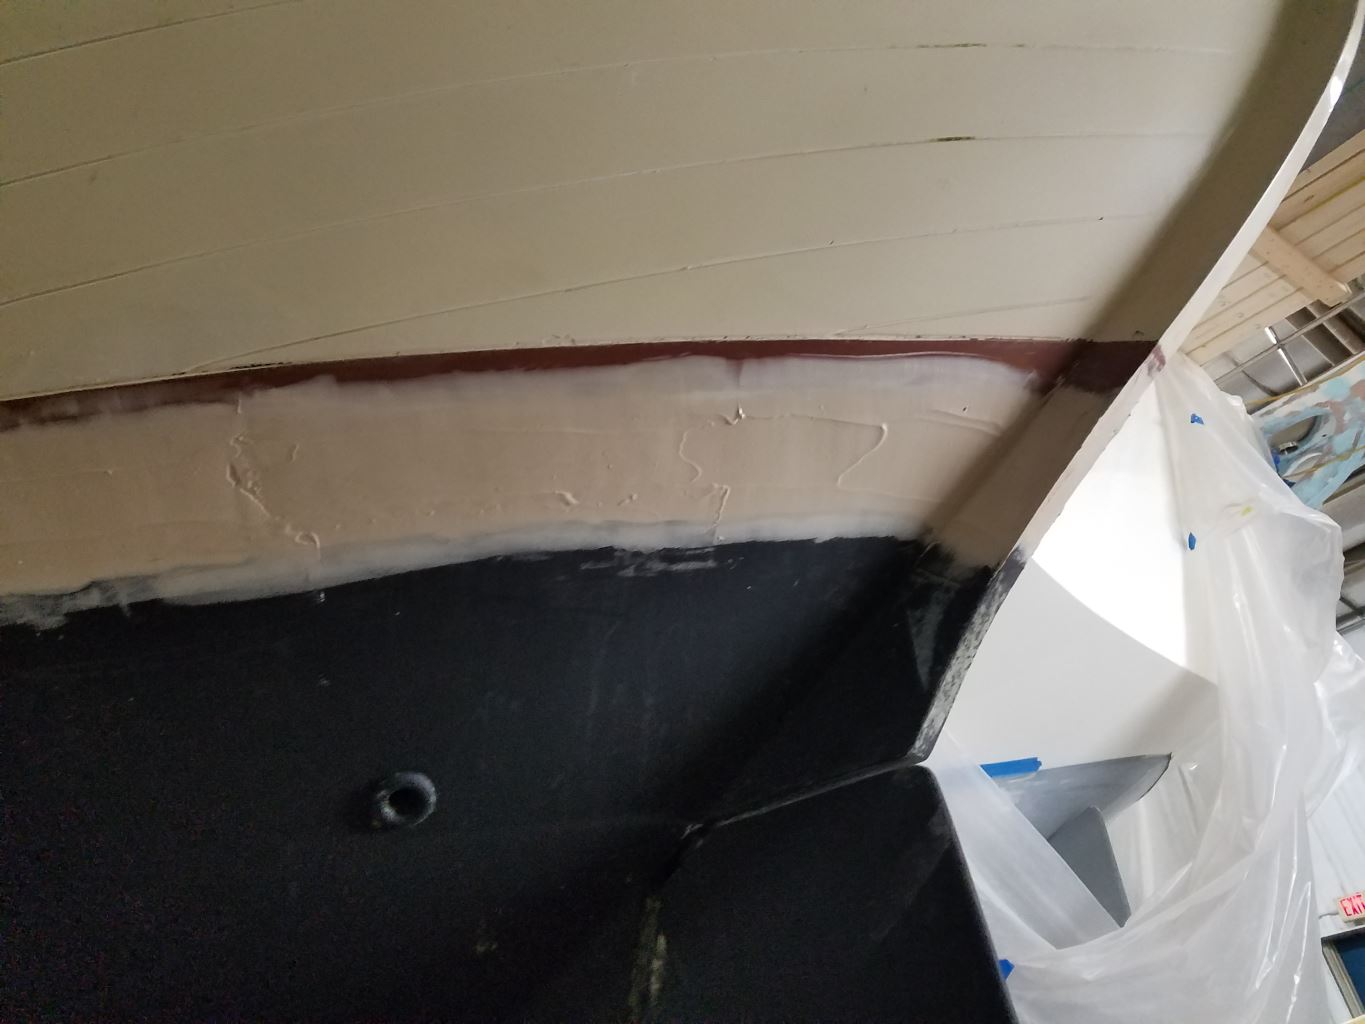
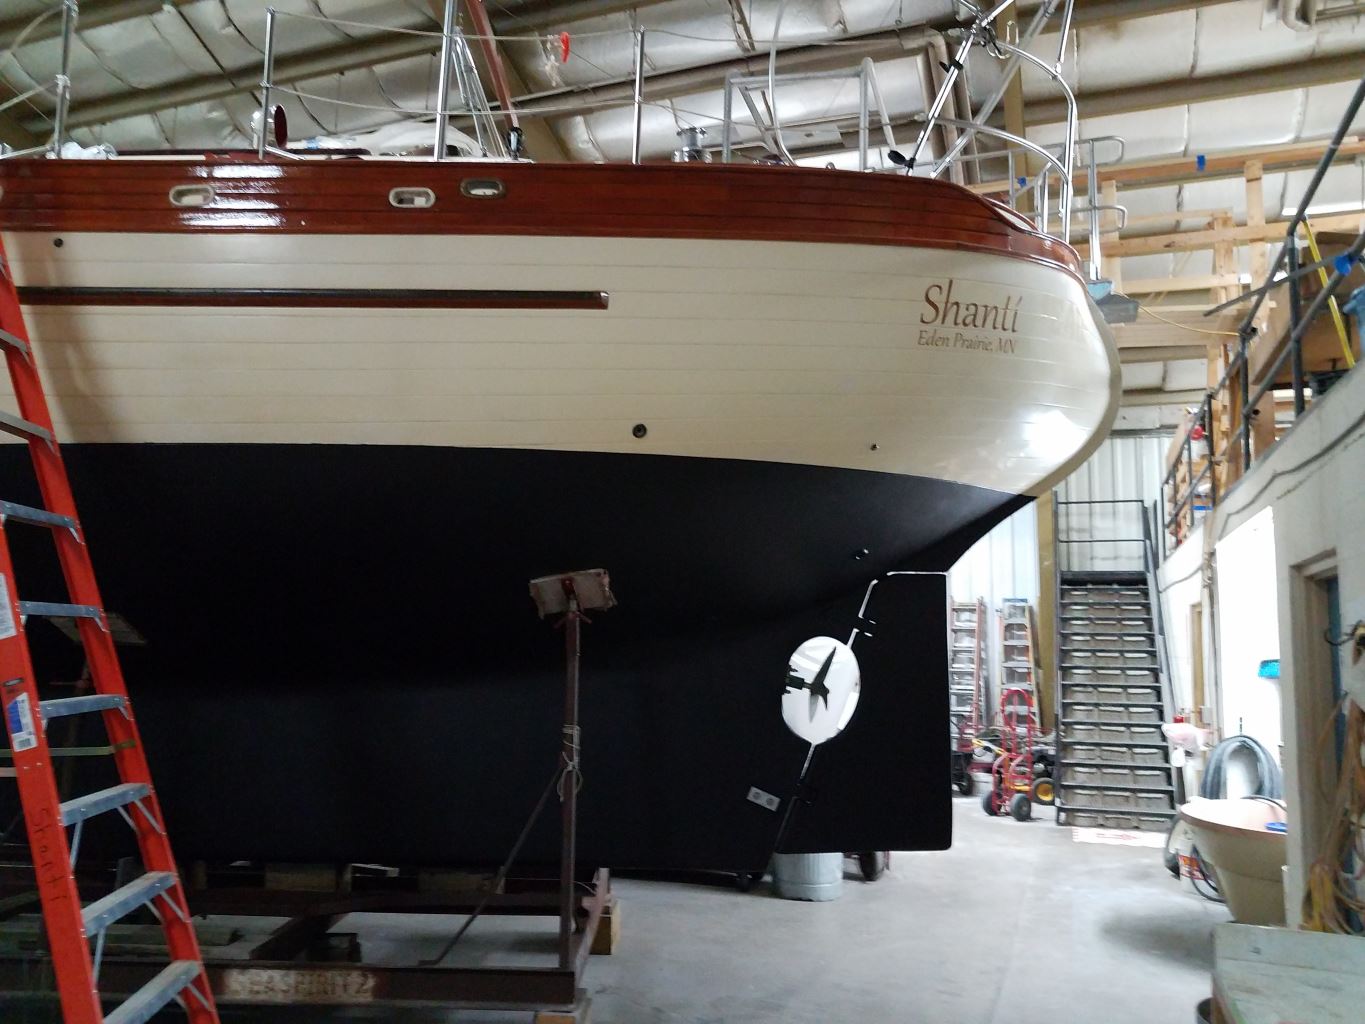
Bootstripe blistering
When we first purchased Shanti, blisters covered her bottom. The marina we purchased her from (Sister Bay) repaired them, but only to the waterline. Last year we noticed more blistering on the bootstripe, so once again we asked Washburn Marina for help. Dale ground out the blisters, then re-faired and sanded the area. He also saw a few drips of water on the keel, and worked to dry it out as best he could. He then gave the entire bottom a quick sand and two coats of Micron ablative paint. In the process, he also changed our zincs for aluminum ones. We think improper sealing of the zinc mounting bolts caused the water intrusion, so he sealed them as well. He did an awesome job – we couldn’t be happier with the result! This is just one example of the above and beyond service we’ve experienced from Washburn Marina.
Pics of blistering
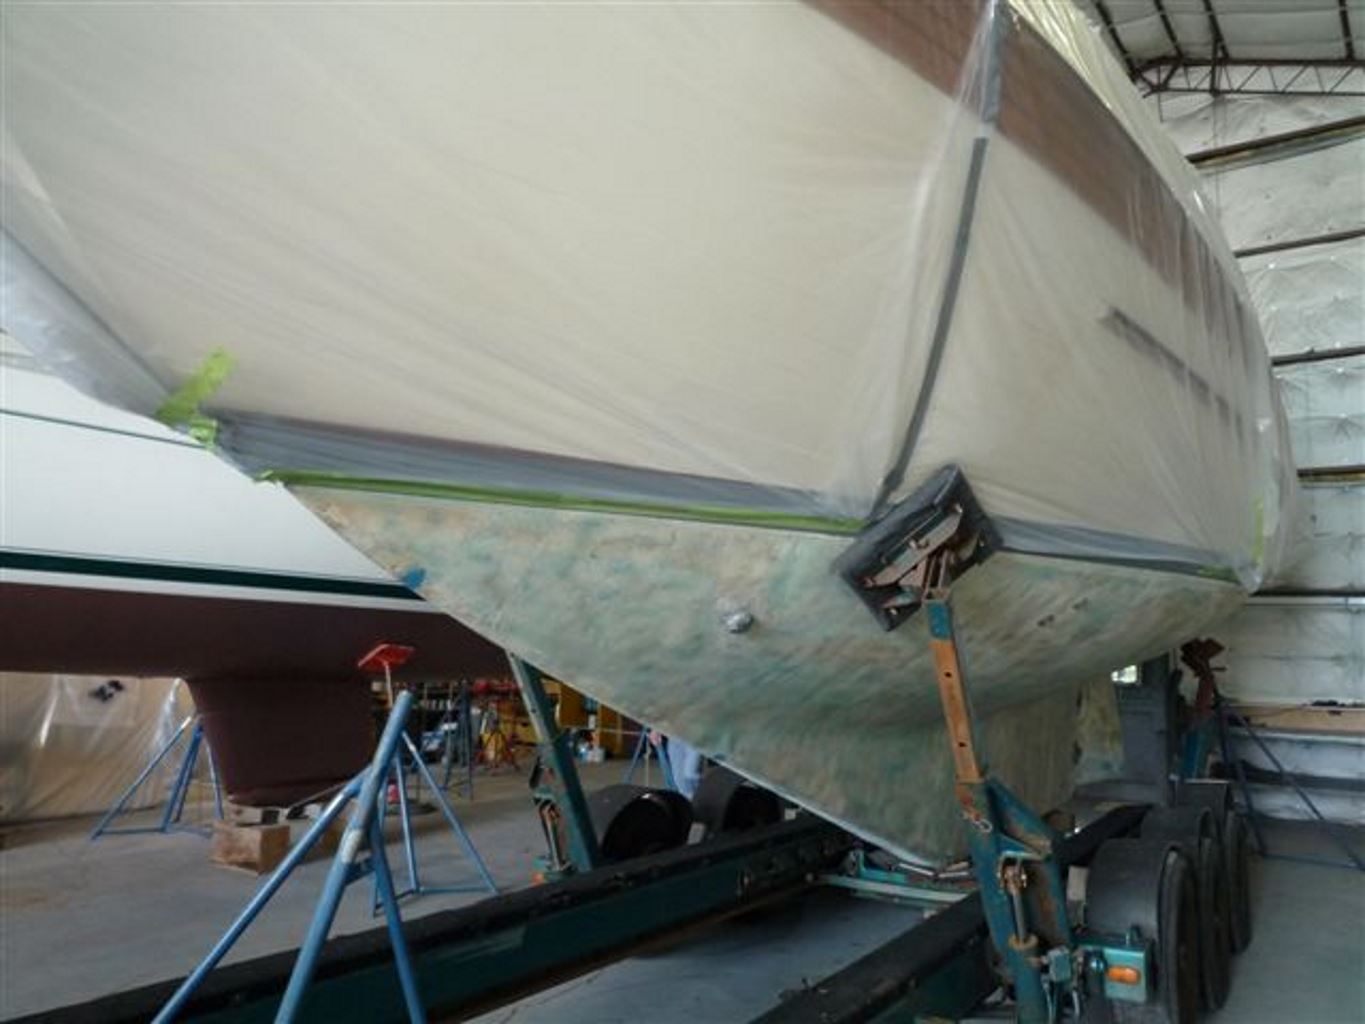
Sandblasted bottom
Severe blistering on hull
Fairing the bootstripe
Shanti’s new bottom – no blisters!
All the other projects
Over the years, we have done dozens of smaller projects, too. We replaced the freshwater diaphragm pump with a Shurflo. Both the kitchen and head faucets have been replaced. One of our portlights was leaking and had to be rebedded. Another portlight had fogged glass, so we disassembled it and replaced the glass. A through-hull valve looked a little iffy: we had it replaced. Our VHF radio has an automatic fog hailer, so we added a removable horn at the bow (for the foggy days so we don’t have to carry as much canned air). We replaced all three batteries, as well as one of our 1/2/All switches.
The list, at times, seemed endless, and there’s still a lot more to do. Most everyone says the list will never end, and will just keep growing (until the day we sell it or die). But slow and steady wins the race, they say. Such is the life of a boat owner.